Multiprocessing with POV-Ray
11/26/23, updated 11/29/23featuring contributions from Greco Moran
Notice
This guide was written with POSIX-compliant operating systems in mind (e.g. Linux, BSD, macOS), however it shouldn't be difficult to adapt the instructions as necessary. For example, Windows users could use Cygwin to get access to a POSIX environment.
Table of Contents
- Intro
- Rendering in Parallel
- Combining The Output
- Pixel Imperfection
- Overlapping Segments
- Writing a Script
- Running a Benchmark
- Conclusion
Intro
In my 2.2 vs 3.7 comparison I mentioned that one of the new features added to POV-Ray 3.7 was SMP (aka multi-threading). In prior versions POV-Ray only ever used a single thread, eventually limiting its ability to fully utilize available CPU power as multi-core systems became more commonplace. However, even DKBTrace made it possible to spread the rendering workload, the proposed solution was distributed computing.
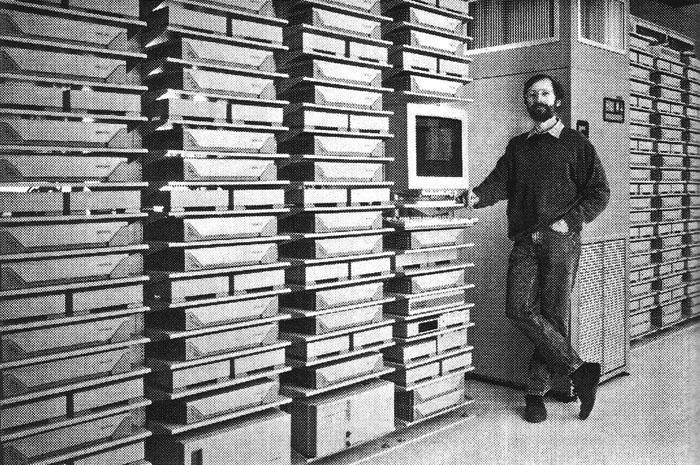
When Pixar rendered the final cut of Toy Story with the SPARCstation 20, they didn't rely on just a single machine. Instead a farm of 117 systems (managed by a SPARCserver 1000E) was put to work rendering 81 minutes of film, generating about 110,000 frames between them. The process took 46 days to complete (this was without ray tracing by the way, which Pixar would only use when needed before fully embracing the technology in Monsters University), imagine how much longer it would have taken if not for distributed computing!
 |
|---|
| The SPARCstation farm that rendered Toy Story. |
Now I'm willing to bet that you don't have 117 workstations to hand, but chances are that your computer's CPU has at least 2 cores with 2 threads each. Instead of splitting POV-Ray's workload between multiple machines, what if we distributed it among our hardware threads?
Rendering in Parallel
How can this be done if pre-3.7 POV-Ray will only ever use a single thread? The answer is multiprocessing. In the absence of multi-threading, a single POV-Ray process will only use a fraction of the CPU, but by running multiple processes at the same time, our operating system can potentially give each process to a different hardware thread!
The obvious application of this would be to render multiple frames of an animation simultaneously, but that wouldn't improve performance when rendering a single image. Fortunately, every version of POV-Ray has command-line parameters we can use to distribute individual images as well:
| DKBTrace | POV-Ray | Description |
|---|---|---|
| +s | +SR | Start render at row xxx. |
| +e | +ER | End render at row xxx. |
Using these options makes it possible to split an image into segments, by rendering each segment with a different process, we can parallelise any render! I'll be using POV-Ray 2.2 to demonstrate, but any version 3.6 or below will do.
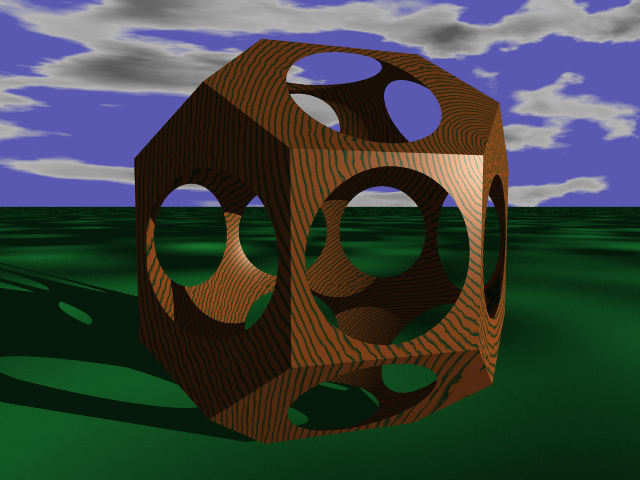
Let's start by taking a look at the normal rendering process, we'll use "Drums" (drums.pov) by Dan Farmer (from the "level3" set in this archive) as our test scene. Here's what the command looks like:
povray2 +L<Location of "include" directory> +Idrums.pov +Odrums.tga +FT +W640 +H480 +A0.1 +VA quick refresher on these parameters:
| Parameter | Description |
|---|---|
| +L | Directory to search when including additional source files (e.g colors.inc). |
| +I | Scene file to render. |
| +O | File to save resulting image to. |
| +F | Image format to use (in this case T for TARGA). |
| +W | Image width. |
| +H | Image height. |
| +A | Level of anti-aliasing. |
| +V | Display verbose messages. |
After rendering the scene this is the result:
| Single Process |
|---|
 |
| 3m49.85s |
That certainly wasn't the fastest render (though it could have been much slower), so now it's time to speed things up! Suppose there's 4 hardware threads available, that means we need to run POV-Ray 4 times to saturate our CPU. Since the new command-line parameters control the range of rows that are rendered, we need to split our image height into as many segments as there are threads.
Assuming an image resolution of 640x480, dividing 480 by 4 gives us 120, so when running POV-Ray each process needs to render a range encompassing 120 rows. Taking this into account our first process will render rows 1-120, the second 121-240, number 3 renders 241-360 and the final process handles rows 361-480. The combined command looks like this (don't forget to give each process a different file to write to!):
povray2 +L<Location of "include" directory> +Idrums.pov +Odrums1.tga +FT +W640 +H480 +A0.1 +V +SR1 +ER120 &
povray2 +L<Location of "include" directory> +Idrums.pov +Odrums2.tga +FT +W640 +H480 +A0.1 +V +SR121 +ER240 &
povray2 +L<Location of "include" directory> +Idrums.pov +Odrums3.tga +FT +W640 +H480 +A0.1 +V +SR241 +ER360 &
povray2 +L<Location of "include" directory> +Idrums.pov +Odrums4.tga +FT +W640 +H480 +A0.1 +V +SR361 +ER480 &
wait
Notice how most lines end with a "&"? Putting an ampersand at the end of a command tells the shell to make that process a background job, this means it won't wait for it to finish executing before continuing on to the next command. That is until it reaches the "wait" command, at which point the shell will hang on until every job has finished.
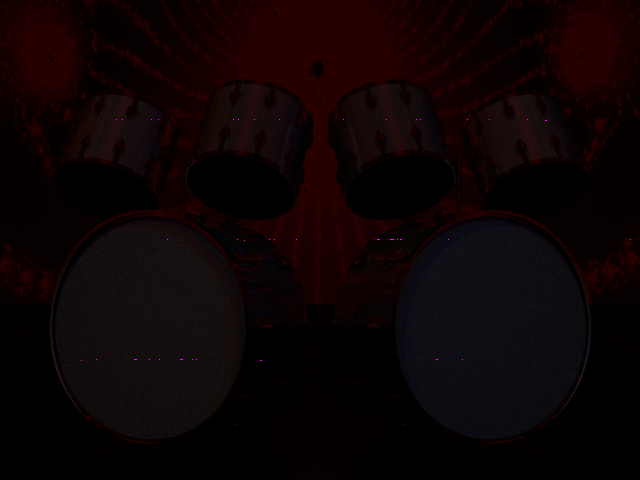
After running the full command we get 4 output files. However, depending on which image viewer you use it might not be able to open them. Fortunately, GIMP can open these files, which will display something like this:
| Render Segment |
|---|
 |
| N/A |
There's the first part of the render at the top, but what's with the big streaks? Since our target resolution was 640x480, POV-Ray set the image properties to specify those dimensions. However, only 120/480 lines were rendered per file, so the rest of the pixels are missing. That's why some image viewers can't open them, they're incomplete! GIMP's solution for this is to repeat the final row to fill the blank space, allowing us to view the partial image.
Combining The Output
From this point you could stitch the segments together manually, but that would get pretty tedious after a few renders. Instead, let's use the shell to combine them for us! The simplest way to merge files in a terminal is with the "cat" (concatenate) command, but that isn't going to work here.
The reason is that the TARGA image format we told POV-Ray to use has some header data at the beginning, this block of information details things like the resolution, pixel format and whether the image is compressed or not. Combining the segments with all 4 headers intact would result in that info being interpreted as pixel data, corrupting the image!
So how do we omit the extra headers? Well, POV-Ray creates 24-bit uncompressed TGA files, which have a header that's exactly 18 bytes long. This makes it very easy to remove, skipping those first 18 bytes is all that's needed! Here's how it's done:
(tail -c +19 drums2.tga
tail -c +19 drums3.tga
tail -c +19 drums4.tga) >> drums1.tga
The utility being used is "tail", a program that outputs file contents starting from the specified offset. There's just 1 parameter and it's easy to understand:
| Parameter | Description |
|---|---|
| -c | Output file from offset in bytes (in this case byte 19, immediately after our header), with "+" the position is relative to the beginning of the file. |
All the commands are enclosed in a single pair of brackets, this runs them in a sub-shell (literally a shell in a shell), which here serves to merge their output together. At the end there's 2 ">" symbols, the first one redirects the command output to a file, then the second appends the data to the end of that file instead of overwriting the original content.
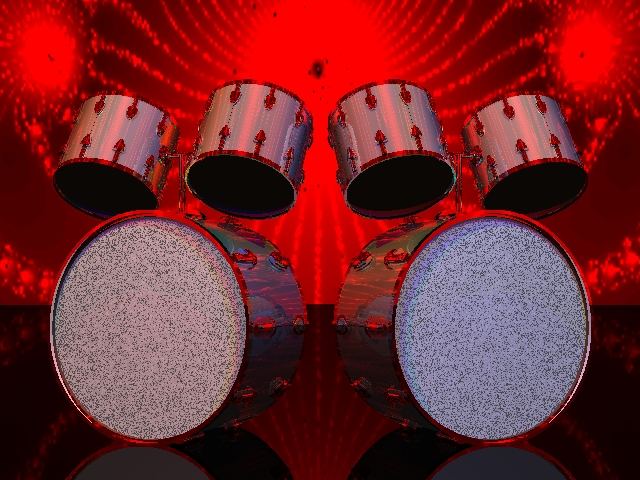
Did you notice that we're appending to the end of the first segment? Since we only grab the pixel data from the other segments simply adding it to the first fills in the missing pixels! With all the segments merged we can finally see the complete render:
| Single Process | 4 Processes |
|---|---|
|
 |
| 3m49.85s | 2m9.83s |
Nice, that render was over a minute and a half faster! Just from looking at the images they would appear to be identical. However, there's more to this than meets the eye...
Pixel Imperfection
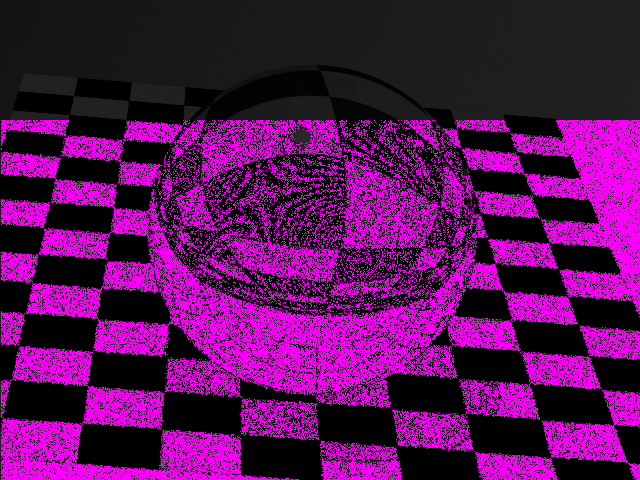
Comparing both renders with a tool like "cmp" shows that the files aren't a perfect match, even though they were created in almost exactly the same way. So what's going on? In order to investigate I've compared the images pixel-by-pixel, if there's any visual differences they'll be highlighted in magenta, here's the result:
| Render Difference |
|---|
 |
| 52 pixels (~0.02%) |
Turns out that despite appearances the multi-processed image isn't pixel perfect, but fortunately the error rate is incredibly low! Looking at where the differences are reveals a particular trend, do you see it? By overlaying the segment boundaries it becomes clear:
| Segment Borders |
|---|
 |
| N/A |
So we can see that the incorrect pixels sit on either side of the segment borders, but that doesn't explain why this happens. As an experiment, let's render the scene again (both with a single process and with multiple) but this time without anti-aliasing. To do that just remove the "+A" parameter from the command-lines, then after some rendering and stitching this is what we get:
| Single Process (No Anti-aliasing) | 4 Processes (No Anti-aliasing) |
|---|---|
 |
|
| 31.36s | 15.01s |
That looks much more jagged than before. However, comparing the files reveals that they're byte-for-byte identical! So what is it about enabling anti-aliasing that creates those discrepancies?
Well, POV-Ray uses an AA technique called Supersampling, which for a ray tracer results in multiple rays being shot through the area of a pixel (think of it like a small window into an area of our scene) instead of just the center. The color values calculated by these new rays are then averaged together to determine the final pixel value. This is a computationally expensive process, as it multiplies the number of rays that your CPU has to crunch through, that's where the "+A" parameter comes in.
Before POV-Ray will commit to supersampling, it uses a formula to calculate the difference between a pixel and its neighbors, if that difference is the same or greater than the threshold set by "+A" then anti-aliasing is performed. Difference values can range from 0-3, so for example setting "+A0.0" would supersample every single pixel!
This decision making step is why, when rendering with multiple processes, those border pixels don't match. Each POV-Ray instance is completely self-contained, they don't have any knowledge of the others or have access to their data (this also means that RAM usage is multiplied by the number of processes you run). Since each segment only encompasses 120 rows, any supersampling decision that is influenced by pixels outside this range will be made differently.
So normally those external rows aren't available to an individual process, but what if they were? By making our segments a row or 2 larger, the boundaries where the errors occur would shift, right?
Overlapping Segments
Let's put that theory to the test! In this new command I've increased the number of lines rendered per segment by 1 at their border, with middle segments being extended on both sides:
povray2 +L<Location of "include" directory> +Idrums.pov +Odrums1.tga +FT +W640 +H480 +A0.1 +V +SR1 +ER121 &
povray2 +L<Location of "include" directory> +Idrums.pov +Odrums2.tga +FT +W640 +H480 +A0.1 +V +SR120 +ER241 &
povray2 +L<Location of "include" directory> +Idrums.pov +Odrums3.tga +FT +W640 +H480 +A0.1 +V +SR240 +ER361 &
povray2 +L<Location of "include" directory> +Idrums.pov +Odrums4.tga +FT +W640 +H480 +A0.1 +V +SR360 +ER480 &
wait
After some rendering we still need to stitch the segments together, but now there's some excess rows that need to be kept out of the final image. That requires a different stitching command, which looks like this:
split -a 1 -b 230418 drums1.tga drums1.tga
tail -c +1939 drums2.tga | split -a 1 -b 230400 - drums2.tga
tail -c +1939 drums3.tga | split -a 1 -b 230400 - drums3.tga
(cat drums1.tgaa drums2.tgaa drums3.tgaa
tail -c +1939 drums4.tga) > drums1.tga
The new utility is "split", which splits files into multiple chunks, these parts are incrementally named using a suffix (a, b, c, d, etc.) with the last argument being the base filename. The parameters used are as follows:
| Parameter | Description |
|---|---|
| -a | Use given number of characters for filename suffix. |
| -b | Each chunk should be at most specified number of bytes in size. |
| - | Don't open an input file, just read from standard input. |
That makes sense but what's the significance of those byte values?
Well, 24-bit uncompressed TGA files (and similar formats) store pixels with 3 bytes, those bytes represent the red, green and blue color components (though TGA actually stores them in reverse order). This means a 640 pixel wide row is 1920 bytes long, multiply that by 120 and we get 230400 bytes for 120 rows. Taking this into account you can see that the first segment is split so that the first part is 1 header + 120 rows large, leaving the extra line in its own chunk.
The middle segments have 2 additional rows however, so it's necessary to make use of both tail and split to extract the pixels. First, tail skips over 1 header + 1 row from the segment and feeds the rest of the file through a pipe ("|"), pipes allow us to feed data from one command straight into another. Then, split receives the data from tail and fills the first chunk with 120 rows worth of bytes, once again separating out the extra row at the end.
Finally with most of the desired pixel data extracted we need to combine it, then add the last segment onto the end. With cat the first chunks from each segment are merged and tail skips the excess from the last one. Once again a sub-shell is used to bring it all together but this time we're overwriting the first segment completely. Now that everything is stitched here's the result:
| Single Process | 4 Processes (Overlapping Segments) |
|---|---|
|
|
| 3m49.85s | 2m20.27s |
It worked! The renders are exactly the same! Those extra rows do make things a little bit slower of course but the performance is still much better than a single process on its own. This is just a single scene though, does this method always work? Let's look at what happens when you render "Crystal" (crystal.pov) from the "level2" scene set with this technique:
| Single Process | 4 Processes (Overlapping Segments) |
|---|---|
 |
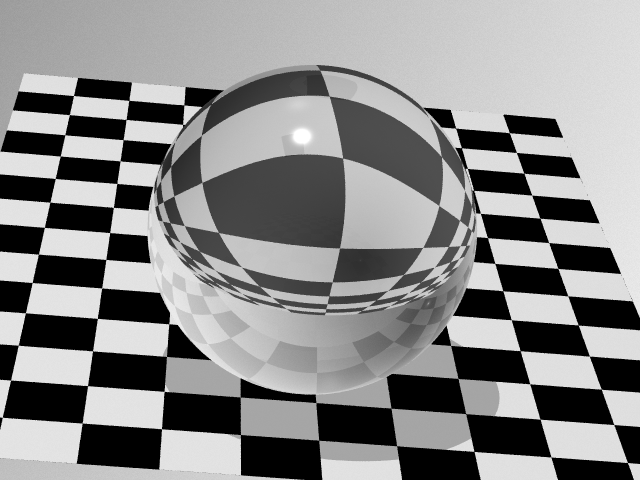 |
| 3.82s | 2.02s |
Both images certainly look identical but comparing them tells a different story:
| Render Difference |
|---|
 |
| 92260 pixels (~30.03%) |
This is a far worse result than expected, the first segment is mostly correct but after that there's errors everywhere! Why doesn't this work like before? As I've mentioned in the past POV-Ray relies on random number generation for various aspects of rendering. Even when that RNG is deterministic not every use of it is limited to the initial processing stage.
Some features such as "crand" (which adds noise to textures) and "jitter" (slightly randomizes the position of area lights) get their random values at render time, not when POV-Ray is reading the scene file. What this means is that if a render starts partway through the image, the random function is called fewer times than it would be otherwise, changing the value received.
From my testing, scenes that differ will either have just 3 or less errors (extending the borders often fixes anti-aliasing but not always) or a few thousand upwards if render time RNG is involved. I have some ideas about how to improve the situation but that's outside the scope of this guide.
So although this solution isn't perfect it's definitely still useful, the amount of time saved when working on a scene can be very significant and there's nothing stopping you from performing the final render as normal. However, this technique in its current form is a bit cumbersome to use, as changing the target resolution or number of threads would require a rewrite of the commands. What if the entire thing was automated?
Writing a Script
By putting together a script, the shell can perform all the necessary segmenting and stitching for us! We'll start by creating a file called "povray-segmented.sh", if you have a directory such as "~/.local/bin/" in your PATH then put it there, otherwise place it next to the scene you want to render. With the file created it needs to be marked as an executable before we can run it:
chmod +x povray-segmented.shNow open the file in your editor of choice. The first thing any shell script needs is a shebang, placed on the first line, these tell the system to run the file using a specific interpreter. To ensure a wider range of OS compatibility I recommend using this one:
#!/usr/bin/env sh| Syntax | Description |
|---|---|
| #!<Location of interpreter> <Interpreter arguments> | Run script with specified interpreter and arguments. |
"env" is a command that among other things can be used to search our PATH for the desired interpreter, which in this case is "sh". Conventionally, sh points to a POSIX-compatible shell on Unix-like operating systems. This does mean we won't have access to some of the advanced scripting features found in Bash for instance, but more systems will be able to run the script without modification.
Next we'll define some variables to be used throughout the script, variables store information in memory that we can use later:
INCLUDE="<Location of "include" directory>" # POV-Ray include directory
POVRAY="povray2" # POV-Ray binary name
ANTIALIAS= # Initially empty variable that stores the "+A" flag if enabled
THREADS=1 # Number of threads to run
PROCESS=1 # Process currently being executed
TIME=$(date +%s.%N) # Time that the render started| Syntax | Description |
|---|---|
| <Variable name>=<Variable value (optional)> | Create variable with specified name and value. |
| # | Comment, the interpreter ignores the rest of the line. |
| $(<Command>) | Command substitution, this is replaced with the output of the sub-shell. |
The comments explain what each variable will be used for, but I still want to mention a couple of things. First, be sure to change the value of "INCLUDE" as indicated (and make sure the path is enclosed with quotation marks), this will provide a convenient shortcut to that directory when writing the POV-Ray invocations later. Also note that variables in shell scripts are often capitalized to make them stand out. The last thing is that "TIME" is being set to the output of the "date" command, specifically the current time in seconds plus nanoseconds, the syntax is "+<Time format>" and we can add regular text (like ".") between formats as desired.
Running background jobs in a script can present a potential issue, as terminating the script won't kill the POV-Ray processes in turn, making it cumbersome to cancel a render. Solving this problem requires adding a couple of things, the first of which you can see here:
stoprender() { # Function used to cancel the render when the script is ended prematurely
	if [ -f "$1" ]; then # Does the file containing process IDs exist?
		kill $(cat "$1") 2> /dev/null # TERMinate all the processes
		rm "$1" # Remove the ID file
		echo "Render terminated."
	fi
	exit 6
}| Syntax | Description |
|---|---|
| <Function name>() { <Commands> } | Create a function with specified name. |
| if [<Condition>] | If statement, evaluate condition and set exit code depending on whether it succeeded. |
| -f <Filename> | Check for existence of file. |
| $<Variable name> | Replaced with value stored in specified variable. |
| ; | Command separator, allows multiple commands on a single line. |
| then <Commands> | Execute commands if previous condition test was successful. |
| fi | End of if statement. |
In this block a function called "stoprender" is being defined. As the name implies executing it will stop POV-Ray if our script is terminated before the render finishes. Functions can be thought of as mini scripts which you can use like other commands within the parent script.
The bulk of stoprender is an if statement (also known as a conditional) which will only kill the POV-Ray processes if a specific file exists. The "-f" condition needs to be given a filename but as you can see we're giving it the value of variable "1". 1 is a special variable which contains the first positional argument given to a script or function (variables exist for every other positional argument too), later on when stoprender is actually used it will be given a filename as its argument. Also note that adding quotation marks around filenames ensures that spaces don't split them into multiple arguments.
The main command responsible for stopping the render is "kill", which sends signals (by default TERM or terminate) to a list of process IDs, providing it with the list of IDs is achieved with cat and command substitution. A common (and often maligned) use of cat is to output the contents of a single file, in this case the file our conditional was looking for. At the end of this line there's some output redirection to "/dev/null" (which discards data you feed it), specifically we redirect any error output from kill by using "2>". The reason is that if the render was canceled after 1 or more segments had already completed then kill would complain that those processes don't exist.
All that's left for this function is to delete the ID file with "rm" (remove), display some text with "echo" and to "exit", returning an exit code of "6". Exit codes other than 0 are considered errors (which is actually how "then" knows if the previous condition test succeeded), being able to use any non-zero number is useful for giving different parts of the script their own error code, which could be handy if we incorporated this script as part of another.
With the initial preparation done we can start writing the main script:
if [ $# -lt 3 ] || [ $# -gt 5 ]; then # Is the number of command-line arguments less than 3 or greater than 5?
	echo "Usage: <POV-Ray scene file> <width> <height> <anti-alias? yes|no (optional)> <number of threads? (optional)>" # Display usage information
	exit 1
elif ! [ -f "$1" ]; then # Does the scene file actually exist?
	echo "File not found: $1"
	exit 2
elif ! [ "$2" -eq "$2" ] 2> /dev/null || ! [ "$3" -eq "$3" ] 2> /dev/null || [ "$2" -le 0 ] || [ "$3" -le 0 ]; then # Are the width and height both whole (non-decimal) numbers and greater than 0?
	echo "Invalid resolution: $2 $3"
	exit 3
fi| Syntax | Description |
|---|---|
| [<Condition>] || [<Condition>] | Logical OR, consider the test successful if either condition is met. |
| <Number> -lt <Number> | Check if the first number is less than the second. |
| <Number> -gt <Number> | Check if the first number is greater than the second. |
| elif [<Condition>] | Like "if" but only checks condition if previous conditional was unsuccessful. |
| ! [<Condition>] | Logical NOT, the test will succeed if the condition is not met. |
| <Number> -eq <Number> | Check if the first number is equal to the second. |
| <Number> -le <Number> | Check if the first number is less than or equal to the second. |
This if statement is more complex than the previous one, not only are there various numeric comparisons but also the inclusion of multiple conditions per block as well as else if statements. First the script makes sure that there's enough (but not too many) command-line arguments, the special variable "#" holds the number of parameters provided. Printing the usage information makes it clear how the script should be operated by the user. Of course, even if there are enough arguments they may not be correct, so next we make sure the scene filename is actually valid.
The other mandatory parameters specify the rendering resolution. A valid pixel resolution has a width and height greater than 0 and doesn't contain any fractional numbers. That last requirement is easy to test by leveraging the fact that these numeric comparisons only work with whole numbers, if the condition test encounters a decimal number such as 5.5 (or indeed a non-numeric value) an error will occur (that's why the /dev/null redirection is in place here too), which with "!" as part of the condition will cause the test to be successfully unsuccessful!
There's only 2 optional parameters to take care of, so let's start with anti-aliasing:
if [ "$4" = "yes" ]; then # Should anti-aliasing be enabled?
	ANTIALIAS="+A0.1" # Set the "ANTIALIAS" variable to the POV-Ray flag (change the value if you want a different level of AA)
elif ! [ -z "$4" ] && ! [ "$4" = "no" ]; then # Was the anti-aliasing parameter set and given an invalid value?
	echo "Invalid anti-aliasing setting: $4"
	exit 4
fi| Syntax | Description |
|---|---|
| <Value> = <Value> | Check if the first value is the same as the second. |
| -z <Variable> | Check if specified variable has a value. |
| [<Condition>] && [<Condition>] | Logical AND, consider the test successful only if both conditions are met. |
The anti-aliasing argument if given has 2 valid values, "yes" and "no". If "yes" is specified then the "ANTIALIAS" variable declared earlier is set accordingly. "no" wouldn't require any additional action but it's possible that the user won't type either of those things, so with "elif" we make sure that it isn't a correct value before quitting with an error.
The final option to process is the number of threads, so here's how it's done:
if ! [ -z "$5" ]; then # Was the threads parameter set?
	if ! [ "$5" -eq "$5" ] 2> /dev/null || [ "$5" -le 0 ]; then # Is the desired threads number a whole number that's greater than 0?
		echo "Invalid threads number: $5"
		exit 5
	fi
	THREADS="$5" # Store threads number
fi
That's easy enough but there's a possible edge-case that needs to be handled:
if ! [ $THREADS -le "$3" ]; then # Does the number of threads exceed the image height?
	echo "Number of threads cannot exceed image height: $THREADS > $3"
	exit 5
fi
Making sure there's at least as many image rows as threads is necessary because otherwise we can't split the image into the number of segments requested!
Finally it's time to implement the main part of the script:
if [ $THREADS -eq 1 ]; then # Are we only using a single thread?
	$POVRAY +L"$INCLUDE" +I"$1" +O"$1".tga +FT +W"$2" +H"$3" $ANTIALIAS +V # Run POV-Ray as normal
else
	while [ $PROCESS -le $THREADS ]; do # Loop until the process number exceeds the number of threads
		if [ $PROCESS -eq 1 ]; then # Is this the first process?
			$POVRAY +L"$INCLUDE" +I"$1" +O"$1"_1.tga +FT +W"$2" +H"$3" $ANTIALIAS +SR1 +ER$(($3 / $THREADS * $PROCESS + 1)) +V & # Set the starting row to 1
		elif [ $PROCESS -eq $THREADS ]; then # Is this the last process?
			$POVRAY +L"$INCLUDE" +I"$1" +O"$1"_$THREADS.tga +FT +W"$2" +H"$3" $ANTIALIAS +SR$(($3 / $THREADS * (($PROCESS - 1)))) +ER"$3" +V & # Set the end row to the image height
			jobs -p > "$1.tga.jobs" # Create the process IDs file
			trap "stoprender \"$1.tga.jobs\"" EXIT INT HUP TERM # Cancel the render if the script is killed early in some way
			wait # Wait until every segment has finished rendering
			trap - EXIT INT HUP TERM # Reset signal handler once render is completed
			rm "$1.tga.jobs" # Remove the ID file
		else
			$POVRAY +L"$INCLUDE" +I"$1" +O"$1"_$PROCESS.tga +FT +W"$2" +H"$3" $ANTIALIAS +SR$(($3 / $THREADS * (($PROCESS - 1)))) +ER$(($3 / $THREADS * $PROCESS + 1)) +V & # Render middle segments with 2 extra rows
		fi
		: $((PROCESS += 1)) # Move to the next process
	done
	PROCESS=1 # Start stitching from the first segment
	while [ $PROCESS -le $THREADS ]; do # Loop until the process number exceeds the number of segments
		if [ $PROCESS -eq 1 ]; then # Is this the first process?
			split -a 1 -b $((18 + $2 * 3 * $3 / $THREADS)) "$1"_1.tga "$1"_1.tga # Split the segment into chunks
			mv "$1"_1.tgaa "$1"_"$THREADS"proc.tga # Change the filename of the first chunk
			rm "$1"_1.tgab "$1"_1.tga # Delete the second chunk & the segment
		elif [ $PROCESS -eq $THREADS ]; then # Is this the last process?
			tail -c +$((18 + $2 * 3 + 1)) "$1"_$PROCESS.tga >> "$1"_"$THREADS"proc.tga # Add the pixels onto the end of the final file
			rm "$1"_$PROCESS.tga # Delete the segment
		else
			tail -c +$((18 + $2 * 3 + 1)) "$1"_$PROCESS.tga | split -a 1 -b $(($2 * 3 * $3 / $THREADS)) - "$1"_$PROCESS.tga # Split the segment into chunks
			cat "$1"_$PROCESS.tgaa >> "$1"_"$THREADS"proc.tga # Add the pixels onto the end of the final file
			rm "$1"_$PROCESS.tgaa "$1"_$PROCESS.tgab "$1"_$PROCESS.tga # Delete the chunks & the segment
		fi
		: $((PROCESS += 1)) # Move to the next segment
	done
fi| Syntax | Description |
|---|---|
| else | Like "elif" but doesn't have a condition. |
| while [<Condition>] | While loop, repeatedly executes block until condition isn't met. |
| do <Commands> | "while" equivalent of "then". |
| ((<Arithmetic>)) | Arithmetic expansion, replaced with the result of a mathematical sum. |
| <Number> / <Number> | Divide first number by second. |
| <Number> * <Number> | Multiply first number by second. |
| \<Characters> | Escape sequence, use special interpretation of specified regular characters or disable special interpretation for specified special characters. |
| : <Arguments> | Null command, expands arguments but doesn't itself do anything. |
| <Variable> += <Number> | Increment specified variable by number. |
| done | End of while loop. |
This segment has a lot going on, the comments explain what's what but I'll still give an overview. To start we need to check if we're actually using more than 1 thread, if not then POV-Ray can be run as normal, note how the shortcut variables defined earlier are used as part of the invocation. When there is more than a single thread, a while loop is entered which will keep launching rendering processes until all the requested threads have been created.
Depending on the process number the POV-Ray command differs. The first process has the starting row specifically set to 1, then the end row becomes the result of the sum <image height>/<thread count>*<process number>+1. This is just like when we did it manually but with the script it's all calculated for us!
Middle rows are very similar but now the starting row is also the result of a calculation, specifically <image height>/<thread count>*(<process number>-1). It's worth noting that like numeric comparisons, arithmetic expansion is also limited to whole numbers. This is helpful for us because it means we don't have to worry about rounding decimal numbers to the desired row.
For the final process the end row is set to the image height, this avoids overshooting if the threads count doesn't divide evenly into the target resolution. After starting the final instance of POV-Ray the script then takes the necessary steps to make it possible to cancel the render. First, the "jobs" command outputs all the background process IDs (this is what the "-p" parameter is for) to a file. Then, with "trap" our stoprender function is set to execute if the "EXIT", "INT", "HUP" or "TERM" signals are received. Notice how stoprender is given the IDs file and that "\"" is used to put literal quotation marks in the command, this ensures that the filename is enclosed and thus considered a single argument. Finally the script will wait for the jobs to finish before continuing, once every segment is rendered the trap we set is disarmed, the IDs file deleted and then the while loop completes.
Now the segments have to be stitched together with another while loop, which starts from the first segment this time. Segment 1 is split with the first chunk being 18+<image width>*3*<image height>/<thread count> bytes large. This initial part is renamed with "mv" (move) to become the final file the other segments will be written to. Then both the second chunk and original segment are deleted with a single rm command.
Middle segments start being read at 18+<image width>*3+1 bytes by tail and are then split at <image width>*3*<image height>/<thread count>. With cat the first chunk is added to the final file, then rm gets rid of the chunks and segment. The final segment is the easiest, tail starts reading from the same position as before and appends the data to the final image. One segment deletion later and we've finished stitching!
That's how the main section works. There's been a lot to understand but fortunately there's just one more thing to add before the script is complete:
echo "Render completed in $(printf '%.2f' $(printf '%s\n' "$(date +%s.%N) - $TIME" | bc -l))s" # Display the final render timeSo far the arithmetic features we've used have only dealt with whole numbers, but our render time is unlikely to be an exact number of seconds. "bc" is the solution to this problem, by feeding it a sum (the "-l" parameter enables the standard math functions) the answer can be obtained as a fractional number. In order to inject the sum "printf" (a text formatting command) pipes the text "<current time> - <starting time>" into bc as a string ("%s") with a newline ("\n"), note that %s means different things to printf and date. This would be enough but I prefer to have the render time to 2 decimal places, so another printf command takes this value and outputs it as such ("%.<decimal places>f").
Putting it all together gives us our final script:
#!/usr/bin/env sh

INCLUDE="<Location of "include" directory>" # POV-Ray include directory
POVRAY="povray2" # POV-Ray binary name
ANTIALIAS= # Initially empty variable that stores the "+A" flag if enabled
THREADS=1 # Number of threads to run
PROCESS=1 # Process currently being executed
TIME=$(date +%s.%N) # Time that the render started

stoprender() { # Function used to cancel the render when the script is ended prematurely
	if [ -f "$1" ]; then # Does the file containing process IDs exist?
		kill $(cat "$1") 2> /dev/null # TERMinate all the processes
		rm "$1" # Remove the ID file
		echo "Render terminated."
	fi
	exit 6
}

if [ $# -lt 3 ] || [ $# -gt 5 ]; then # Is the number of command-line arguments less than 3 or greater than 5?
	echo "Usage: <POV-Ray scene file> <width> <height> <anti-alias? yes|no (optional)> <number of threads? (optional)>" # Display usage information
	exit 1
elif ! [ -f "$1" ]; then # Does the scene file actually exist?
	echo "File not found: $1"
	exit 2
elif ! [ "$2" -eq "$2" ] 2> /dev/null || ! [ "$3" -eq "$3" ] 2> /dev/null || [ "$2" -le 0 ] || [ "$3" -le 0 ]; then # Are the width and height both whole (non-decimal) numbers and greater than 0?
	echo "Invalid resolution: $2 $3"
	exit 3
fi

if [ "$4" = "yes" ]; then # Should anti-aliasing be enabled?
	ANTIALIAS="+A0.1" # Set the "ANTIALIAS" variable to the POV-Ray flag (change the value if you want a different level of AA)
elif ! [ -z "$4" ] && ! [ "$4" = "no" ]; then # Was the anti-aliasing parameter set and given an invalid value?
	echo "Invalid anti-aliasing setting: $4"
	exit 4
fi

if ! [ -z "$5" ]; then # Was the threads parameter set?
	if ! [ "$5" -eq "$5" ] 2> /dev/null || [ "$5" -le 0 ]; then # Is the desired threads number a whole number that's greater than 0?
		echo "Invalid threads number: $5"
		exit 5
	fi
	THREADS="$5" # Store threads number
fi

if ! [ $THREADS -le "$3" ]; then # Does the number of threads exceed the image height?
	echo "Number of threads cannot exceed image height: $THREADS > $3"
	exit 5
fi

if [ $THREADS -eq 1 ]; then # Are we only using a single thread?
	$POVRAY +L"$INCLUDE" +I"$1" +O"$1".tga +FT +W"$2" +H"$3" $ANTIALIAS +V # Run POV-Ray as normal
else
	while [ $PROCESS -le $THREADS ]; do # Loop until the process number exceeds the number of threads
		if [ $PROCESS -eq 1 ]; then # Is this the first process?
			$POVRAY +L"$INCLUDE" +I"$1" +O"$1"_1.tga +FT +W"$2" +H"$3" $ANTIALIAS +SR1 +ER$(($3 / $THREADS * $PROCESS + 1)) +V & # Set the starting row to 1
		elif [ $PROCESS -eq $THREADS ]; then # Is this the last process?
			$POVRAY +L"$INCLUDE" +I"$1" +O"$1"_$THREADS.tga +FT +W"$2" +H"$3" $ANTIALIAS +SR$(($3 / $THREADS * (($PROCESS - 1)))) +ER"$3" +V & # Set the end row to the image height
			jobs -p > "$1.tga.jobs" # Create the process IDs file
			trap "stoprender \"$1.tga.jobs\"" EXIT INT HUP TERM # Cancel the render if the script is killed early in some way
			wait # Wait until every segment has finished rendering
			trap - EXIT INT HUP TERM # Reset signal handler once render is completed
			rm "$1.tga.jobs" # Remove the ID file
		else
			$POVRAY +L"$INCLUDE" +I"$1" +O"$1"_$PROCESS.tga +FT +W"$2" +H"$3" $ANTIALIAS +SR$(($3 / $THREADS * (($PROCESS - 1)))) +ER$(($3 / $THREADS * $PROCESS + 1)) +V & # Render middle segments with 2 extra rows
		fi
		: $((PROCESS += 1)) # Move to the next process
	done
	PROCESS=1 # Start stitching from the first segment
	while [ $PROCESS -le $THREADS ]; do # Loop until the process number exceeds the number of segments
		if [ $PROCESS -eq 1 ]; then # Is this the first process?
			split -a 1 -b $((18 + $2 * 3 * $3 / $THREADS)) "$1"_1.tga "$1"_1.tga # Split the segment into chunks
			mv "$1"_1.tgaa "$1"_"$THREADS"proc.tga # Change the filename of the first chunk
			rm "$1"_1.tgab "$1"_1.tga # Delete the second chunk & the segment
		elif [ $PROCESS -eq $THREADS ]; then # Is this the last process?
			tail -c +$((18 + $2 * 3 + 1)) "$1"_$PROCESS.tga >> "$1"_"$THREADS"proc.tga # Add the pixels onto the end of the final file
			rm "$1"_$PROCESS.tga # Delete the segment
		else
			tail -c +$((18 + $2 * 3 + 1)) "$1"_$PROCESS.tga | split -a 1 -b $(($2 * 3 * $3 / $THREADS)) - "$1"_$PROCESS.tga # Split the segment into chunks
			cat "$1"_$PROCESS.tgaa >> "$1"_"$THREADS"proc.tga # Add the pixels onto the end of the final file
			rm "$1"_$PROCESS.tgaa "$1"_$PROCESS.tgab "$1"_$PROCESS.tga # Delete the chunks & the segment
		fi
		: $((PROCESS += 1)) # Move to the next segment
	done
fi

echo "Render completed in $(printf '%.2f' $(printf '%s\n' "$(date +%s.%N) - $TIME" | bc -l))s" # Display the final render time
Now we have a script it's time to put it to the test! Let's render drums.pov again (omit the "./" if the script is in your PATH):
./povray-segmented.sh drums.pov 640 480 yes 4Once the render has finished open "drums.pov_4proc.tga" and take a look:
| 4 Processes (Manual) | 4 Processes (Script) |
|---|---|
|
|
| 2m20.27s | 2m22.04s |
Great, it's working as intended! Now we can freely change the number of threads used:
| 4 Processes (Script) | 7 Processes (Script) |
|---|---|
|
|
| 2m22.04s | 2m4.25s |
Bizarrely it's possible to exceed the number of available hardware threads and somehow get a faster render. I don't know what's going on here but feel free to experiment and see what works best for you!
Running a Benchmark
With these performance gains now available to us I'm curious to see how fast things really are. At the beginning I mentioned that version 3.7 introduced true multi-threading to POV-Ray, but how does that stack up when compared to this multiprocessing approach? Could 2.2 now genuinely compete for speed?
Using the "level2" scene set let's put that to the test! Note that I'll only be using 4 threads for the script because 3.7 creates them based on your hardware thread count. The POV-Ray command-lines are as follows:
povray-segmented.sh <input scene file> 640 480 yes 4
povray3 +I<input scene file> +O<output image file> +FT +W640 +H480 +A0.1 +MV2.2 +V| Parameter | Description |
|---|---|
| +MV | Render as if running specified version. |
After some rendering here's the results:
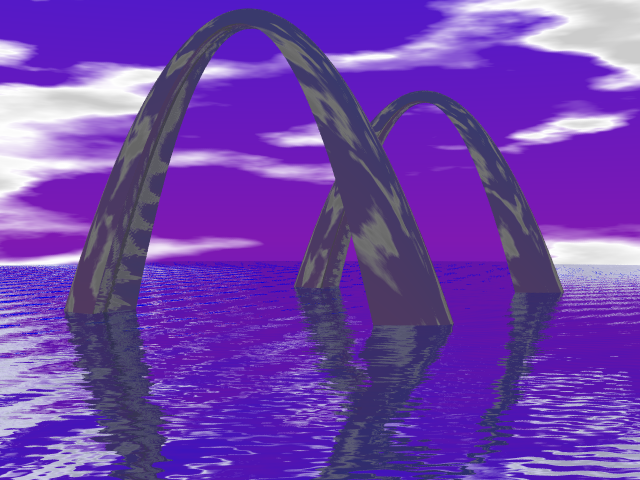
"Arches" (arches.pov) by Dan Farmer
| POV-Ray 2.2 (Script) | POV-Ray 3.7 |
|---|---|
 |
 |
| 2.74s | 4.32s |
"Cluster of mirrored spheres" (cluster.pov) by Andy Fu
| POV-Ray 2.2 (Script) | POV-Ray 3.7 |
|---|---|
 |
 |
| 1.20s | 1.95s |
"Crystal" (crystal.pov) by Dan Farmer
| POV-Ray 2.2 (Script) | POV-Ray 3.7 |
|---|---|
|
 |
| 2.14s | 2.77s |
"Eight" (eight.pov) by Ville Saari
| POV-Ray 2.2 (Script) | POV-Ray 3.7 |
|---|---|
 |
 |
| 0.44s | N/A |
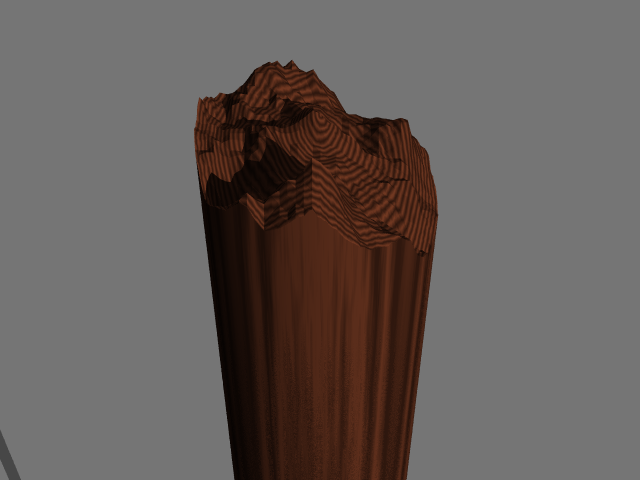
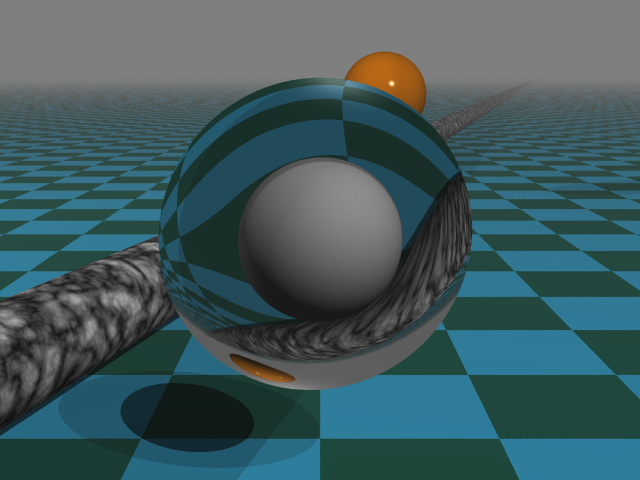
"Broken dowel" (hfclip.pov) by Dan Farmer
| POV-Ray 2.2 (Script) | POV-Ray 3.7 |
|---|---|
 |
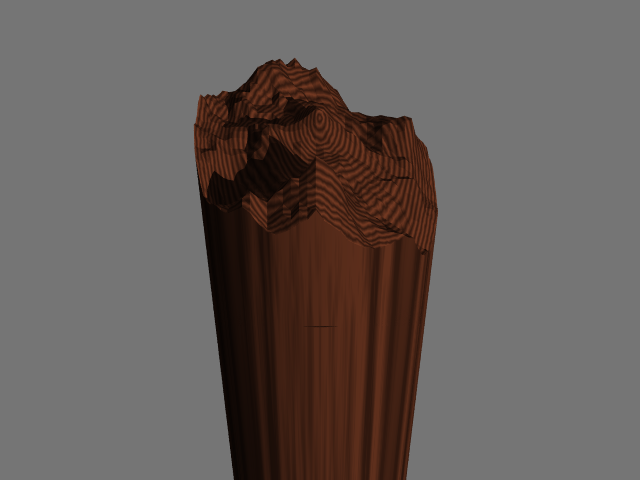 |
| 1.20s | 2.16s |
"Illuminate 1" (illum1.pov) by Tom Price
| POV-Ray 2.2 (Script) | POV-Ray 3.7 |
|---|---|
 |
 |
| 7.96s | 14.27s |
"Illuminate 2" (illum2.pov) by Tom Price
| POV-Ray 2.2 (Script) | POV-Ray 3.7 |
|---|---|
 |
 |
| 3.48s | 4.58s |
"Ior test" (iortest.pov) by ???
| POV-Ray 2.2 (Script) | POV-Ray 3.7 |
|---|---|
 |
|
| 39.64s | N/A |
"Lamppost" (lamppost.pov) by Anton Raves
| POV-Ray 2.2 (Script) | POV-Ray 3.7 |
|---|---|
 |
 |
| 6.22s | 10.62s |
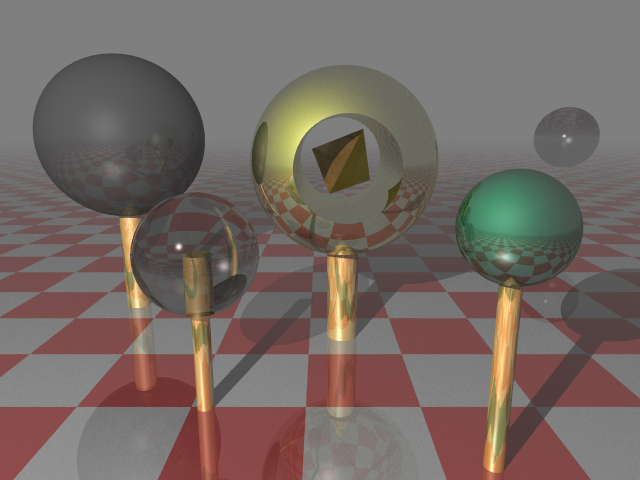
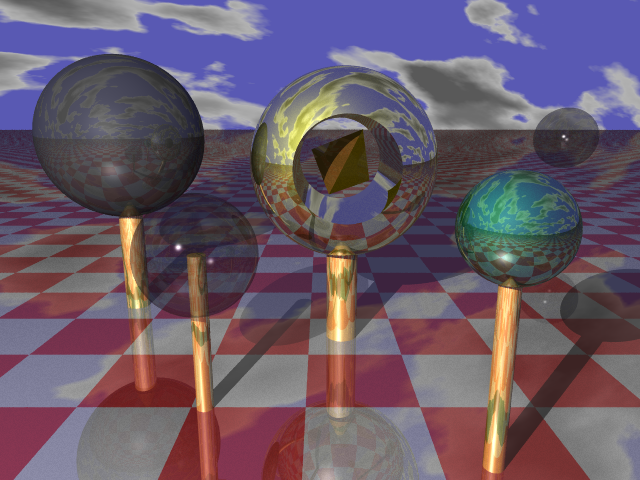
"Lollipops 1" (lpops1.pov) by Tom Price
| POV-Ray 2.2 (Script) | POV-Ray 3.7 |
|---|---|
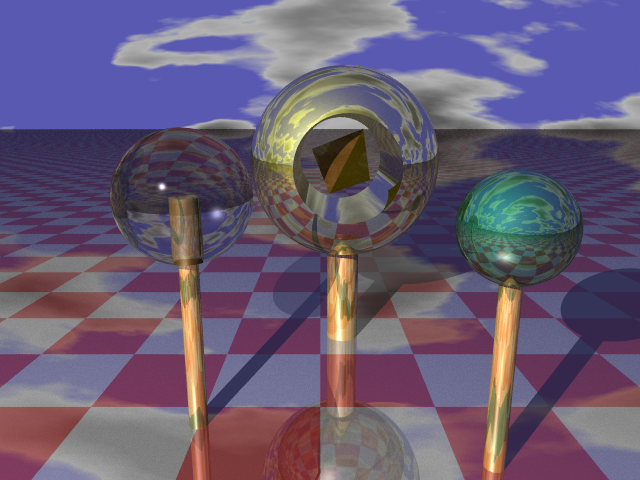 |
 |
| 3.83s | 4.11s |
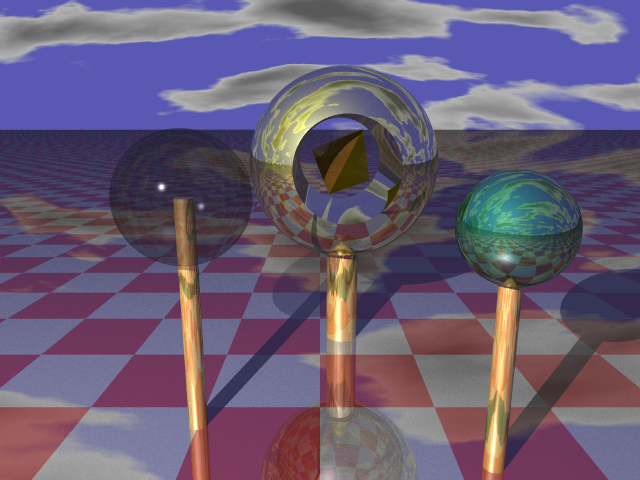
"Lollipops 2" (lpops2.pov) by Tom Price
| POV-Ray 2.2 (Script) | POV-Ray 3.7 |
|---|---|
 |
 |
| 2.64s | 4.88s |
"Magnifying glass created using POV-Ray's refraction" (magglass.pov) by ???
| POV-Ray 2.2 (Script) | POV-Ray 3.7 |
|---|---|
 |
|
| 1.12s | N/A |
"Mt. Mandelbrot" (mtmand.pov) by Dan Farmer & Tim Wegner
| POV-Ray 2.2 (Script) | POV-Ray 3.7 |
|---|---|
 |
 |
| 0.74s | 1.71s |
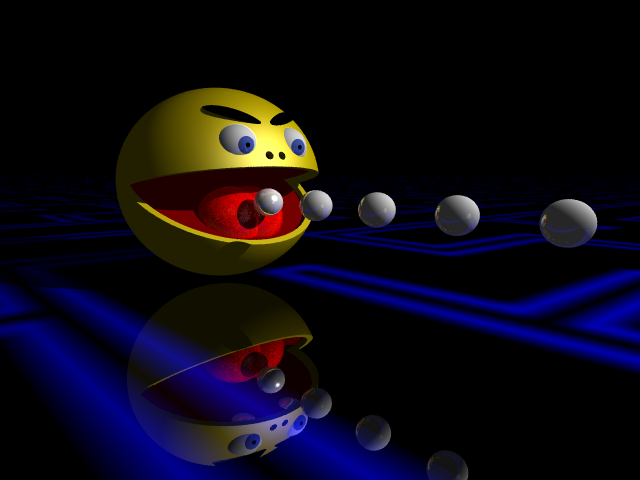
"Pac Man" (pacman.pov) by Ville Saari
| POV-Ray 2.2 (Script) | POV-Ray 3.7 |
|---|---|
 |
|
| 0.68s | N/A |
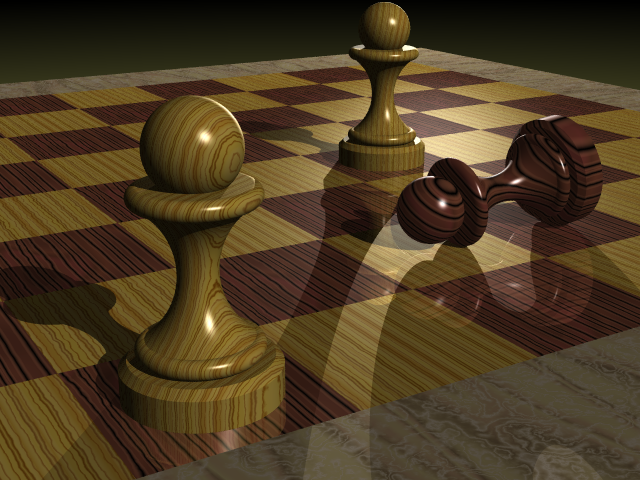
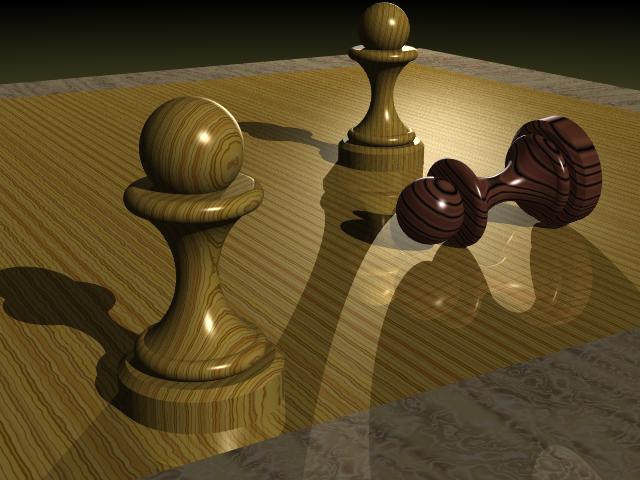
"Pawns" (pawns.pov) by Douglas Otwell
| POV-Ray 2.2 (Script) | POV-Ray 3.7 |
|---|---|
 |
 |
| 23.69s | 13.87s |
"Planet" (planet.pov) by Ville Saari
| POV-Ray 2.2 (Script) | POV-Ray 3.7 |
|---|---|
 |
 |
| 0.69s | 2.16s |
"PolyWood" (polywood.pov) by Eduard [esp] Schwan
| POV-Ray 2.2 (Script) | POV-Ray 3.7 |
|---|---|
 |
 |
| 1.41s | 2.67s |
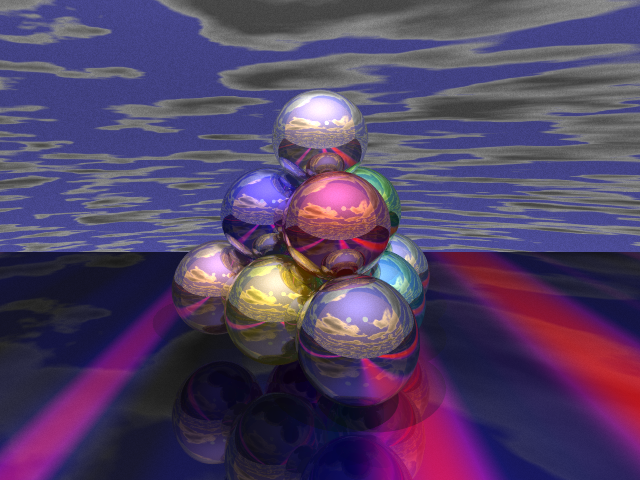
"Pool balls" (poolball.pov) by Dan Farmer
| POV-Ray 2.2 (Script) | POV-Ray 3.7 |
|---|---|
 |
 |
| 0.55s | 1.24s |
"Romo" (romo.pov) by ???
| POV-Ray 2.2 (Script) | POV-Ray 3.7 |
|---|---|
 |
 |
| 2.23s | 4.56s |
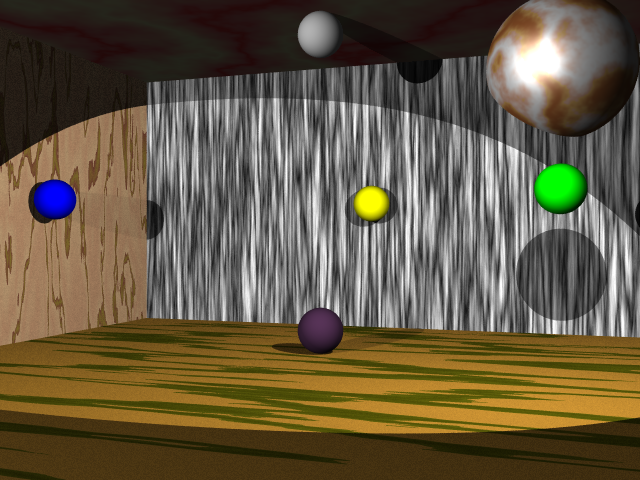
"Room" (room.pov) by Drew Wells
| POV-Ray 2.2 (Script) | POV-Ray 3.7 |
|---|---|
 |
 |
| 1.93s | 3.82s |
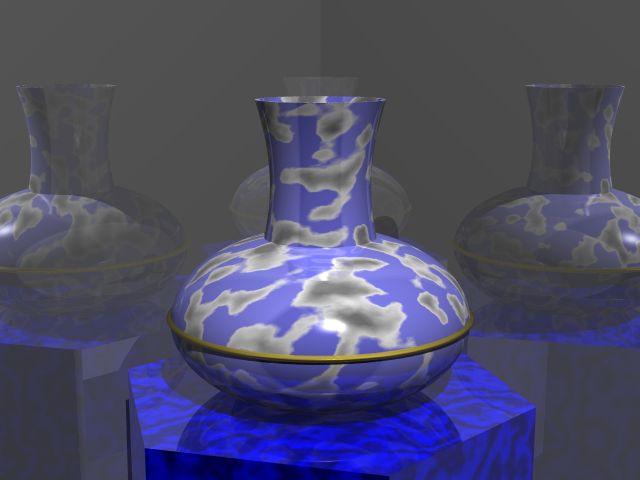
"Sky vase" (skyvase.pov) by Dan Farmer
| POV-Ray 2.2 (Script) | POV-Ray 3.7 |
|---|---|
 |
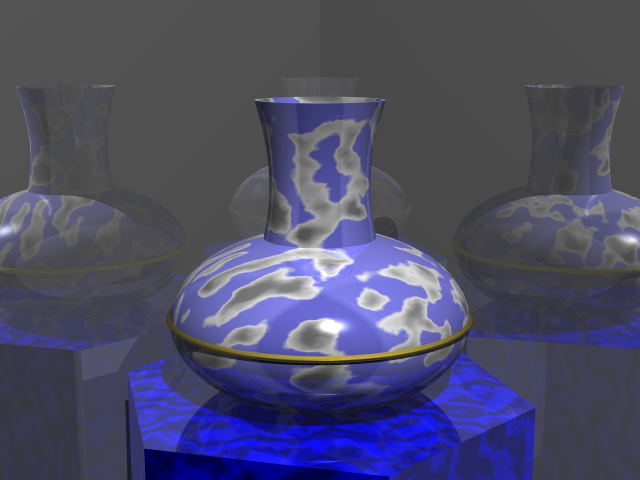 |
| 2.57s | 3.23s |
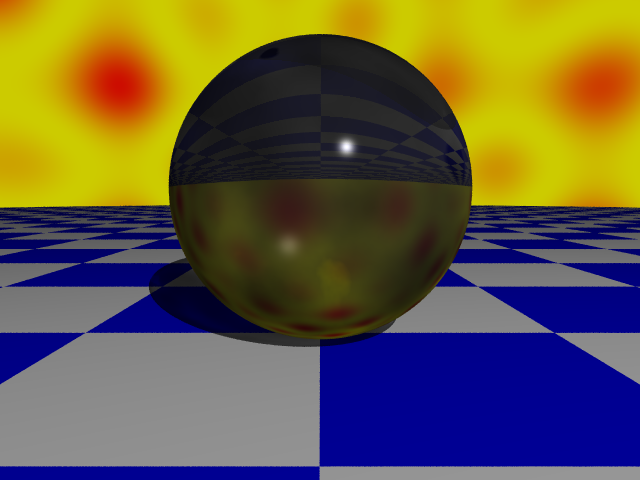
"Dark, smokey glass ball" (smoke.pov) by ???
| POV-Ray 2.2 (Script) | POV-Ray 3.7 |
|---|---|
 |
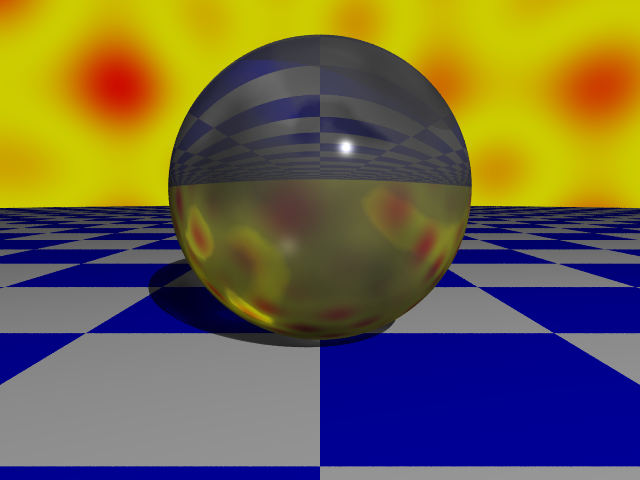 |
| 0.43s | 1.64s |
"Demo of extended light sources" (soft.pov) by Steve Anger
| POV-Ray 2.2 (Script) | POV-Ray 3.7 |
|---|---|
 |
 |
| 3.52s | 2.95s |
"Spline" (spline.pov) by Drew Wells
| POV-Ray 2.2 (Script) | POV-Ray 3.7 |
|---|---|
 |
 |
| 1.12s | 1.55s |
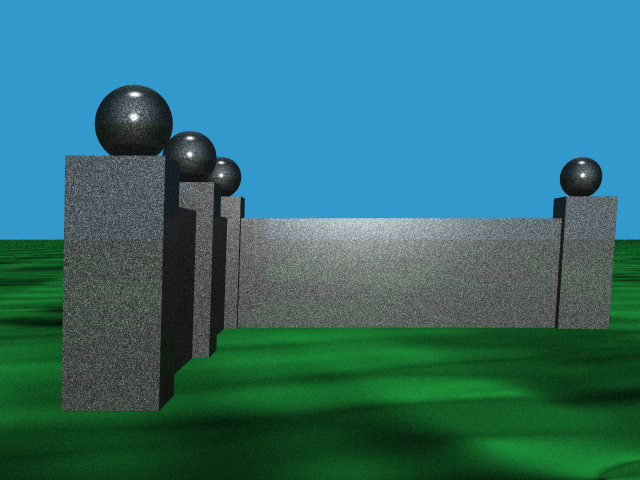
"Stone wall" (stonewal.pov) by Dan Farmer
| POV-Ray 2.2 (Script) | POV-Ray 3.7 |
|---|---|
 |
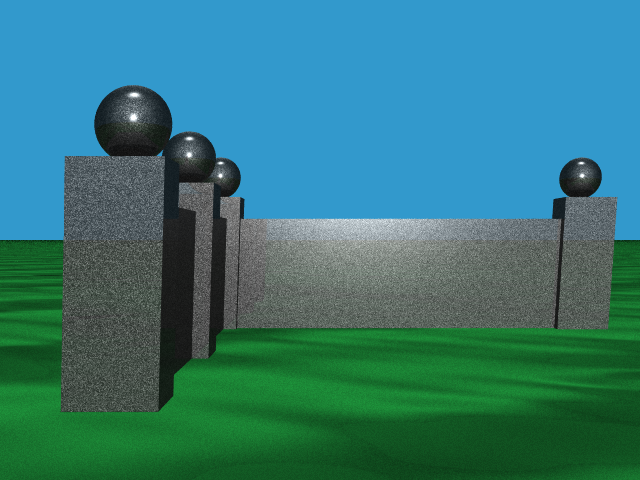 |
| 3.24s | 3.22s |
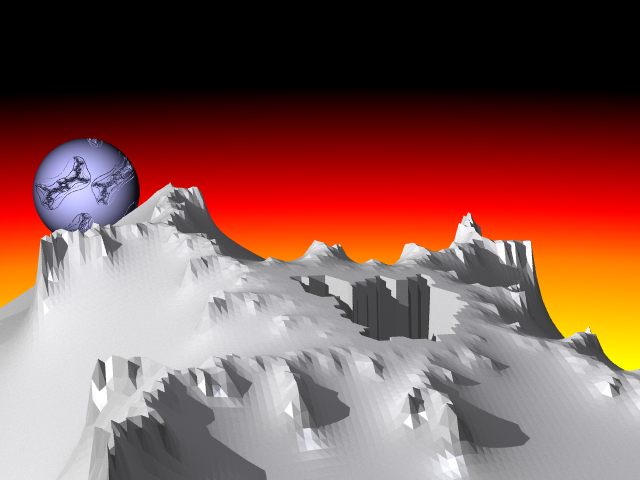
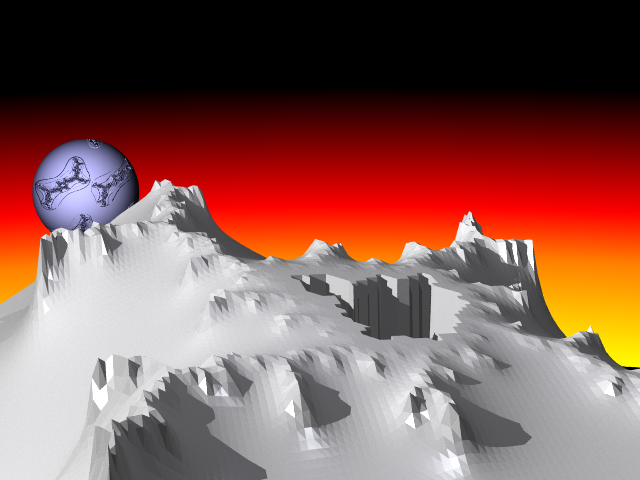
"Height field sample" (sunsethf.pov) by Douglas Muir
| POV-Ray 2.2 (Script) | POV-Ray 3.7 |
|---|---|
 |
 |
| 3.23s | 4.52s |
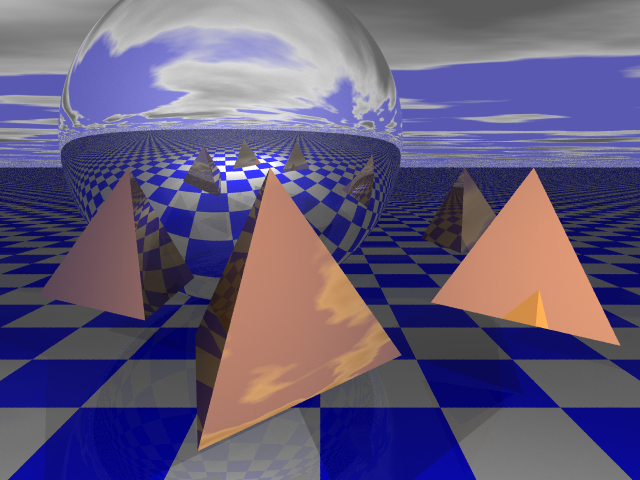
"Tetra" (tetra.pov) by ???
| POV-Ray 2.2 (Script) | POV-Ray 3.7 |
|---|---|
 |
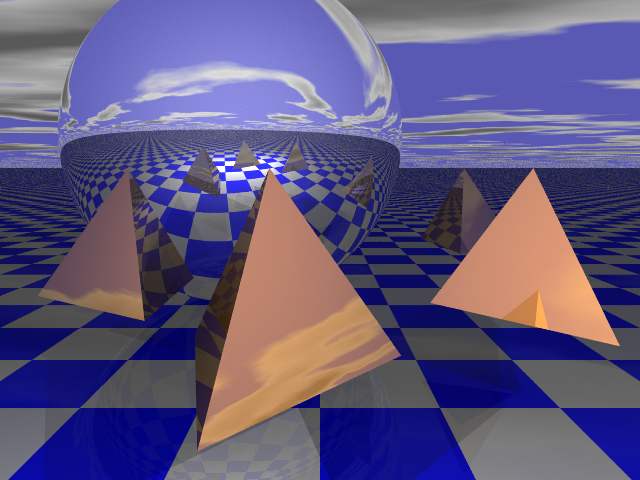 |
| 3.16s | 3.27s |
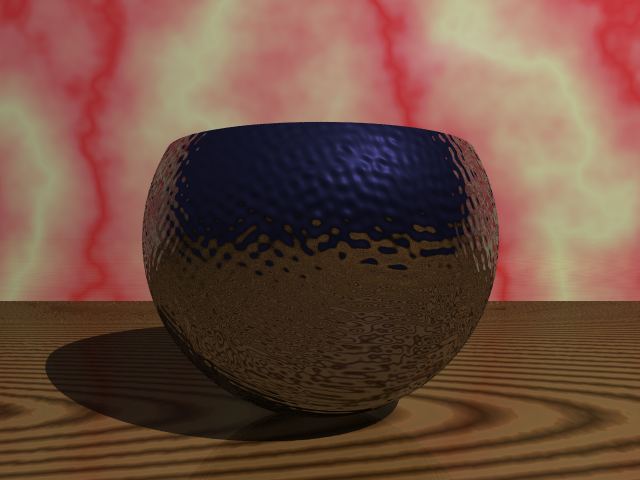
"Water bowl" (waterbow.pov) by Various and Sundry
| POV-Ray 2.2 (Script) | POV-Ray 3.7 |
|---|---|
 |
 |
| 2.67s | 4.64s |
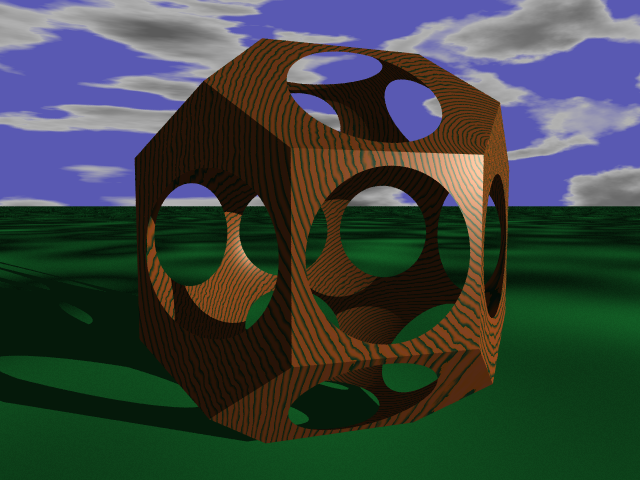
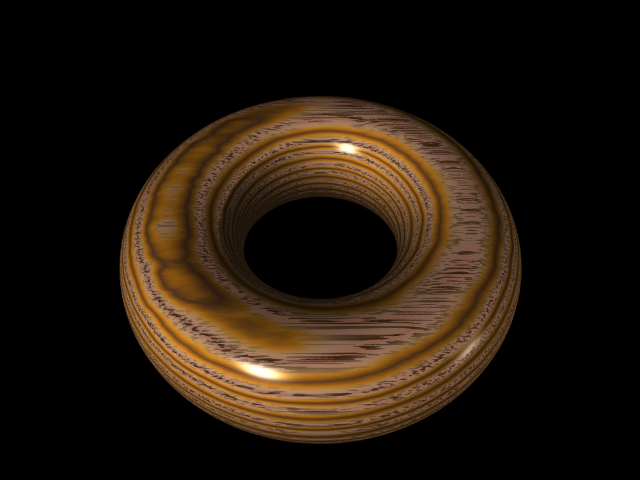
"A single wooden torus" (wtorus.pov) by Dan Farmer
| POV-Ray 2.2 (Script) | POV-Ray 3.7 |
|---|---|
 |
 |
| 2.39s | 2.05s |
Now that the scenes are rendered let's look at the stats:
| Statistic | POV-Ray 2.2 (Script) | POV-Ray 3.7 |
|---|---|---|
| Scenes rendered | 29/29 (100%) | 25/29 (~86%) |
| Accurate renders | 29/29 (100%) | 13/29 (~45%) |
| Fastest render | 0.43s (smoke.pov) | 1.24s (poolball.pov) |
| Slowest render | 39.64s (iortest.pov) | 14.27s (illum1.pov) |
| Times fastest (both versions rendered only) | 21/25 (84%) | 4/25 (16%) |
| Final time (both versions rendered only) | 1m24.97s (17.65 scenes/m) | 1m46.76s (14.05 scenes/m) |
Unbelievably, with multiprocessing POV-Ray 2.2 almost manages to completely outclass 3.7! This is despite the fact that 3.7 is a truly multi-threaded application and isn't relying on clever workarounds. My only guess is that a combination of a much larger feature-set and nearly 20 years of extra technical debt have somewhat limited 3.7's efficiency when compared to its more humble predecessors.
Conclusion
We covered a lot this time around, but I hope it was worth it! Even though this method doesn't always produce pixel-perfect output, the speed increase is both impressive and scalable. By providing more CPU power, the improvement becomes even more substantial! The concepts explored here can even be applied to other software, so go out and experiment to see what multiprocessing can do for you!